Brother MFC9200C fix error codes list
– Compatible Printer model: Brother MFC9200C
– Brother MFC9200C Error Codes with instructions guide:
- Code: 23
- Description: Printer engine timeout.
- Causes: • Main PCB
- Code: 25
- Description: Ink cartridges had already been loaded when the powerwas first applied.
- Causes:
- Code: 30
- Description: The carriage cannot travel to the right or left.
- Causes: • Carriage ASSY • Encoder strip (Any stains orscratches? Hooked correctly?) • Carriage motor • Main PCB • Power supply PCB • Purge unit • Main chassis
- Code: 31
- Description: After driven by the specified number of pulses, the carriagedoes not stop (since it cannot detect the left end of thetravel).
- Causes:
- Code: 32
- Description: The carriage movement parameter exceeded the travelrange during printing.
- Causes:
- Code: 33
- Description: The carriage cannot move in midway of travel.
- Causes:
- Code: 34
- Description: The carriage stops during the short travel.
- Causes:
- Code: 35
- Description: The carriage stops during low-speed travel.
- Causes:
- Code: 36
- Description: The carriage stop position is out of the travel range.
- Causes:
- Code: 37
- Description: The carriage speed has exceeded the upper limit.
- Causes:
- Code: 38
- Description: The carriage speed has dropped below the lower limitduring constant-speed travel.
- Causes:
- Code: 39
- Description: The carriage has overridden the travel range.
- Causes:
- Code: 3B
- Description: Printing area error.
- Causes:
- Code: 3C
- Description: Sudden carriage stop during printing.
- Causes:
- Code: 41
- Description: The head drive voltage has not been turned from Low toHigh within the specified time.
- Causes: • Carriage ASSY • Main PCB • Print head unit • Power supply PCB
- Code: 42
- Description: The head drive voltage has not been turned from High toLow within the specified time.
- Causes:
- Code: 43
- Description: Head thermistor broken.
- Causes: • Print head unit • Carriage ASSY • Main PCB
- Code: 44
- Description: Head thermistor short-circuited.
- Causes:
- Code: 45
- Description: Flushing operation abnormally ended. (The headtemperature has arisen abnormally.)
- Causes: • Print head unit
- Code: 46
- Description: The number of performed purge sequences has reachedthe limit.
- Causes: • Ink absorber box • Main PCB
- Code: 47
- Description: Head parameter stored in the EEPROM on either of thetwo print heads is invalid. (This code may appear only in the maintenance mode.)
- Causes: • Print head unit • Main PCB • Power supply PCB
- Code: 4B
- Description: Abnormal carriage travel speed detected when the powerwas applied.
- Causes: • Encoder strip (Anystains or scratches? Hooked correctly?) • Purge unit • Main chassis • Carriage ASSY • Main PCB
- Code: 4D
- Description: Error of the reference voltage in the video capture circuit.
- Causes: • Main PCB
- Code: 4E
- Description: Out of the allowable range of the head drive voltagedesigned for individual print head properties.
- Causes: • Main PCB • Print head unit
- Code: 50
- Description: The purge cam HP switch does not come ON even afterthe purge cam has been driven by the specified number ofpulses.
- Causes: • Purge unit • Purge-related gears onthe main chassis (Purgegears 18 and 19, gearstopper, and purgebevel gear 18) • Main chassis • Paper feed motor • Main PCB
- Code: 51
- Description: The purge cam HP switch does not go OFF even after thepurge cam has been driven by the specified number ofpulses.
- Causes:
- Code: 52
- Description: The pump switching cam HP switch does not come ONeven after the switching cam has been driven by thespecified number of pulses.
- Causes:
- Code: 53
- Description: The pump switching cam HP switch does not go OFF evenafter the switching cam has been driven by the specifiednumber of pulses.
- Causes:
- Code: 73
- Description: Any of the four ink cartridges is not set into place.
- Causes: • Ink cartridges • Carriage PCB • Head flat cables • Main PCB
- Code: 82
- Description: Recording paper feeding error.
- Causes: • ASF • Registration sensor actuator • Main PCB
- Code: 83
- Description: Recording paper jam. (The registration sensor sticks to OFF, indicating thatpaper has jammed.)
- Causes: • Registration sensor actuator • Main PCB
- Code: 84
- Description: Recording paper jam. (The paper ejection sensor has detected a paper jam.)
- Causes: • Paper ejection sensor actuator • Registration sensor actuator • Main PCB
- Code: 88
- Description: Recording paper jam. (Even after the registration sensor has come ON, thepaper ejection sensor does not detect paper.)
- Causes:
- Code: A1
- Description: Scanner unit opened.
- Causes: • Scanner open sensorPCB and open sensor actuator • Main PCB • Document tray ASSYand scanner unit
- Code: A2
- Description: Document too long to scan.
- Causes: • Document front sensor actuator • Document rear sensor actuator • Control panel PCB • Document sensor PCB • Document feed roller • ADF motor • Main PCB
- Code: A3
- Description: Document not detected by the document rear sensor.
- Causes:
- Code: A4
- Description: 50% or more faulty of white level data.
- Causes: • CCD unit • Main PCB
- Code: A7
- Description: One-line feeding timeout.
- Causes:
- Code: A8
- Description: One-line scanning timeout.
- Causes:
- Code: AC
- Description: Less than 50% faulty of white level data.
- Causes: • CCD unit • Main PCB
- Code: AE
- Description: The CCD HP sensor sticks to OFF, indicating that theCCD unit has not returned to the home position.
- Causes: • CCD unit • Main PCB • CCD motor • CCD drive belt
- Code: AF
- Description: The CCD HP sensor sticks to ON, indicating that the CCDunit has stayed in the home position.
- Causes:
- Code: B1
- Description: Dark level offset data error.
- Causes:
- Code: B2
- Description: Gain control data error.
- Causes:
- Code: B3
- Description: Scan area left edge detection error.
- Causes:
- Code: B4
- Description: Scan area right edge detection error.
- Causes:
- Code: B5
- Description: Scan magnification (checked with the black marks printedon the white-level reference film) less than the specifiedvalue.
- Causes:
- Code: B6
- Description: Scan magnification (checked with the black marks printedon the white-level reference film) greater than the specifiedvalue.
- Causes:

Solved Brother MFC9200C Error codes
- Code: BE
- Description: Detection error of the black marks printed on the white-level reference film.
- Causes:
- Code: BF
- Description: Detection error of ADF scanning position.
- Causes:
- Code: D5
- Description: The MODEM has failed to complete the commandtransmission sequence.
- Causes:
- Code: E4
- Description: Out of recording paper.
- Causes: • ASF • Registration sensor actuator • Document feed roller • Main PCB
- Code: E6
- Description: Write error in EEPROM.
- Causes: • Main PCB
- Code: E8
- Description: Data scanning error during transmission.
- Causes: • CCD unit • Main PCB
- Code: EA
- Description: Document removed at phase B.
- Causes:
- Code: F6
- Description: PC interface error.
- Causes: • Interface cable • Main PCB
– Get more error code list with quick guide to fix printer product, click here
– About get help with reseting Epson inkpad or others, click here
About Canon Servie Tool V5610
– Canon Service Tool V5610 is a tool used to perform maintenance on Canon printers and reset Canon printers after replacement of parts such as replacing ink absorbents, print heads, printer mainboard, and others. Based on the many cases we have encountered, the Service Tool is most often used to reset ink absorber counter value when the waste ink absorber is full.
– The ink absorber is going to be full of box, it has to be replaced or cleaned the waste ink absorber. Also, replaceing or cleaning the waste ink absorber, you need to repair or reset the waste ink counter value, cause those parts are concerned to each others.
– So using Canon Service Tool V5610 to reset the waste ink counter value becomes effective when the ink absorber is replaced or cleaned.

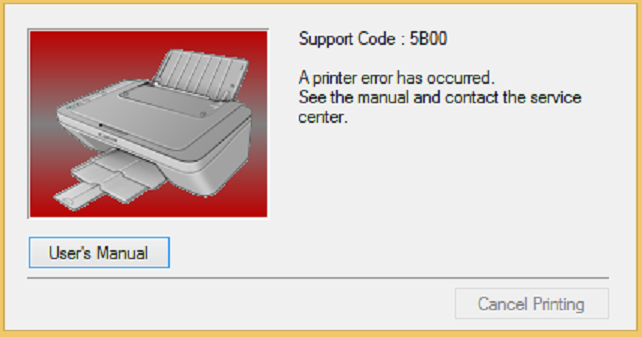
– Canon Service Tool V5610 can use to fix error code 5B00, 5B02, 5B04, 5B14, 1701, 1702, 1700 on your printer. You must enter Service Mode on your printer to use this Canon Service Tool.
– If the printer can not enter Service Mode, you can not reset it by Canon ST V5610. In this case, change EEPROM on the logic board.
Canon Service Tool V5610 Functions
– Fix Canon printer 7 times/ 8 times red light blinking:

– Fix Canon printer error code: 5B00, 5B01, 1700, 1701

Enter Service Mode on Canon Printer
1. Turn off a printer
2. Press and hold the Resume/Cancel/Stop button
3. Press and hold the ON button (do not release both buttons)
4. Release the Resume/Cancel/Stop button (do not release the ON button)
5. While holding the ON button, press the Resume/Cancel/Stop button 5 times, then release both the ON and Resume/Cancel/Stop buttons together.
– Canon printer in service mode: computer detects new hardware, led on printer goes green light.
For more information about Canon Serice Tool V5610
– Get more information about Epson XP 15000 troubleshooting, click here
– Buy cheap key of Epson WIC Reset Tool, CLICK HERE
– Key Epson Adjustment Program, CLICK HERE
https://dnasofts.com/download-epson-xp-6100-driver-firmware-and-manuals/
Contact us to get support with Brother MFC9200C Error case
Telegram: https://t.me/hyperaktiv
Facebook: https://www.facebook.com/dngnm/
Or click here to get more ways.
Source:
https://dnasofts.com
https://shop.nguyendangnam.com/

