Repair Canon iR1270 Printer Error Codes Canon Servie Tool
– Printer model: Canon iR1270
– Error codes on Canon iR1270 model and its description:

– Canon iR1270 printer Error Codes and quick guide to troubleshooting:
- Code: E000
- Description: The error history indicates any of the following error codes 4 times: E001, E002, E003.
- Causes: Clear the error.
- Solutions: 1) Clear the error. Execute ‘#4 PRINTER RESET” under ‘#7 PRINTER’ in service mode to clear the error.; then, turn back on the power.
- Code: E001-000
- Description: The main thermistor detects 230°C/446°F or higher for 1 sec or more.
- Causes: – The fixing film unit is faulty (thermistor short circuit). The power supply PCB is faulty. The DC controller PCB is faulty.
- Solutions: 1. Malfunction Turn off the power; wait for 10 min, and turn it on. Is the problem corrected? YES: End. 2. Fixing film unit Check the connector (4-pin) of the thermistor for electrical continuity: 1-2 and 3-4. Is it 0 Ohm? YES: Replace the fixing film unit. 3. Power supply PCB, DC controller PCB Try replacing the power supply PCB. Is the problem corrected? NO: Replace the DC controller PCB.
- Code: E001-001
- Description: The sub thermistor detects 300°C/572°F or higher for 0.2 sec or more.
- Causes: – The fixing film unit is faulty (thermistor short circuit). The power supply PCB is faulty. The DC controller PCB is faulty.
- Solutions: 1. Malfunction Turn off the power; wait for 10 min, and turn it on. Is the problem corrected? YES: End. 2. Fixing film unit Check the connector (4-pin) of the thermistor for electrical continuity: 1-2 and 3-4. Is it 0 Ohm? YES: Replace the fixing film unit. 3. Power supply PCB, DC controller PCB Try replacing the power supply PCB. Is the problem corrected? NO: Replace the DC controller PCB.
- Code: E002-000
- Description: During printing, the main thermistor detects 0°C/32°F or lower for 1 sec or more continuously. About 10 sec or later after power-on/start of printing, the main thermistor detects less than 120°C/248°F for 1 sec or more continuously.
- Causes: – The fixing film unit is faulty (main thermistor fault, sub thermistor fault, thermal fuse blow, fixing heater fault). The power supply PCB is faulty. The DC controller PCB is faulty.
- Solutions: 1. Malfunction Turn off the power; wait for 10 min, and turn on the power. Is the problem corrected? YES: End. 2. Wiring Is the wiring from the DC controller PCB to the fixing film unit normal? NO: Correct the wiring. 3. Fixing film unit Try replacing the fixing film unit. Is the problem corrected? YES: End. 4. Power supply PCB, DC controller PCB Try replacing the power supply PCB. Is the problem corrected? YES: End. NO: Replace the DC controller PCB.
- Code: E002-001
- Description: After power-on/start of printing, the reading of the main thermistor does not reach the target value -15°C/11°F or higher within 75 sec. About 10 sec or later after the heater is supplied with power, the sub thermistor detects less than 75°C/167°F for 2 sec or more continuously.
- Causes: – The fixing film unit is faulty (main thermistor fault, sub thermistor fault, thermal fuse blow, fixing heater fault). The power supply PCB is faulty. The DC controller PCB is faulty.
- Solutions: 1. Malfunction Turn off the power; wait for 10 min, and turn on the power. Is the problem corrected? YES: End. 2. Wiring Is the wiring from the DC controller PCB to the fixing film unit normal? NO: Correct the wiring. 3. Fixing film unit Try replacing the fixing film unit. Is the problem corrected? YES: End. 4. Power supply PCB, DC controller PCB Try replacing the power supply PCB. Is the problem corrected? YES: End. NO: Replace the DC controller PCB.
- Code: E003
- Description: During printing, the main thermistor detects less than 120°C/248°F for 1 sec or more continuously.
- Causes: – The fixing film unit is faulty (main thermistor fault, thermal fuse blow, fixing heater fault). The power supply PCB is faulty. The DC controller PCB is faulty.
- Solutions: 1. Malfunction Turn off the power; wait for 10 min, and turn on the power. Is the problem corrected? YES: End. 2. Wiring Is the wiring from the DC controller PCB to the fixing film unit normal? NO: Correct the wiring. 3. Fixing film unit Try replacing the fixing film unit. Is the problem corrected? YES: End. 4. Power supply PCB, DC controller PCB Try replacing the power supply PCB. Is the problem corrected? YES: End. NO: Replace the DC controller PCB.
- Code: E100
- Description: About 1.5 sec after the scanner drive signal output, the BDI* signal is not detected 3 times or more for 1.0 sec. While the laser is ON, the BD signal cycle is not as indicated for 0.5 or more continuously.
- Causes: – The laser driver/BD PCB is faulty (laser activation failure, BD detection fault). The DC controller PCB is faulty. The image processor PCB is faulty.
- Solutions: 1. Wiring Is the wiring from the DC controller PCB to the laser scanner unit normal? NO: Correct the wiring 2. Laser scanner unit Try replacing the laser scanner unit. Is the problem corrected? YES: End. 3. DC controller PCB, Image processor PCB Try replacing the DC controller PCB. Is the problem corrected? YES: End. NO: Replace the image processor PCB.
- Code: E110
- Description: The scanner fails to reach the target speed of rotation 10 sec after the laser scanner motor reaches constant speed state.
- Causes: – The laser scanner motor is faulty. The DC controller PCB is faulty.
- Solutions: 1. Laser scanner unit, DC controller PCB Try replacing the laser scanner unit. Is the problem corrected? YES: End. NO: Replace the DC controller PCB.
- Code: E805
- Description: While the fan is rotating, fan lock state is detected for 10 sec or more continuously.
- Causes: – The fan is faulty. The DC controller PCB is faulty. The image processor PCB is faulty.
- Solutions: 1. Foreign matter Is there any foreign matter that hinders the rotation of the heat discharge fan? YES: Remove the foreign matter. 2. Wiring, Connection Are the wiring and connection (connectors) of the fan normal? NO: Correct them. 3. Fan Try replacing the fan. Is the problem corrected? YES: End. 4. DC controller PCB/Image processors PCB Try replacing the DC controller PCB. Is the problem corrected? YES: End. NO: Replace the image processor PCB.
- Code: E810
- Description: The case that the toner bottle is detected, but not the cartridge.
- Causes: – The DC controller PCB is faulty. The cartridge is faulty.
- Solutions: 1. High-voltage contact (between machine and the developing unit) Is the high-voltage spring used to supply high voltage to the developing unit soild? YES: Clean it. 2. High-voltage contact (between high-voltage spring and DC controller PCB; J207) Is the connection between the high-voltage spring and the DC controller PCB(J207) normal? NO: Correct the connection. If the problem cannot be corrected, replace the faulty part. 3. Developing unit, DC controller PCB Replace the developing unit. Is the problem corrected? YES: End. NO: Replace the DC controller PCB.
About Canon Servie Tool V5610
– Canon Service Tool V5610 is a tool used to perform maintenance on Canon printers and reset Canon printers after replacement of parts such as replacing ink absorbents, print heads, printer mainboard, and others. Based on the many cases we have encountered, the Service Tool is most often used to reset ink absorber counter value when the waste ink absorber is full.
– The ink absorber is going to be full of box, it has to be replaced or cleaned the waste ink absorber. Also, replaceing or cleaning the waste ink absorber, you need to repair or reset the waste ink counter value, cause those parts are concerned to each others.
– So using Canon Service Tool V5610 to reset the waste ink counter value becomes effective when the ink absorber is replaced or cleaned.

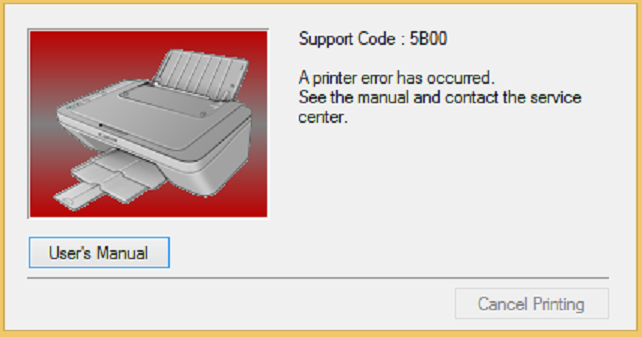
– Canon Service Tool V5610 can use to fix error code 5B00, 5B02, 5B04, 5B14, 1701, 1702, 1700 on your printer. You must enter Service Mode on your printer to use this Canon Service Tool.
– If the printer can not enter Service Mode, you can not reset it by Canon ST V5610. In this case, change EEPROM on the logic board.
Canon Service Tool V5610 Functions
– Fix Canon printer 7 times/ 8 times red light blinking:

– Fix Canon printer error code: 5B00, 5B01, 1700, 1701

Enter Service Mode on Canon Printer
1. Turn off a printer.
2. Press and hold the Resume/Cancel/Stop button.
3. Press and hold the ON button (do not release both buttons).
4. Release the Resume/Cancel/Stop button (do not release the ON button).
5. While holding the ON button, press the Resume/Cancel/Stop button 5 times, then release both the ON and Resume/Cancel/Stop buttons together.
– Canon printer in service mode: computer detects new hardware, led on printer goes green light.
– Download Canon driver and firmware in specific model: https://dnasofts.com/canon-c7000vp-printer-driver-firmware-and-user-manual-free-download/
– Download Epson driver and firmware in specific model: https://dnasofts.com/download-epson-cx8400-driver-firmware-and-manuals/
Source:
https://chiplessprinter.com/canon-service-tool-v5610.html
https://dnasofts.com
https://shop.nguyendangnam.com/
https://nguyendangnam.me/
https://chiplessprinter.com/reset-epson-waste-ink-pad-counter.html
Contact us to get support with Canon iR1270 Error case
Telegram: https://t.me/hyperaktiv
Facebook: https://www.facebook.com/dngnm/

